Damselfly phenomics#
For a more detailed description see: https://www.phenopype.org/gallery/projects/damselfly-phenomics/
import phenopype as pp
import os

## my root directory - modify as you see fit
os.chdir(r"D:\science\packages\phenopype\phenopype-gallery_exec")

## my laptop has a small screen, so I use a smaller phenopype window
pp._config.window_max_dim = 800
Extract ROI from images#
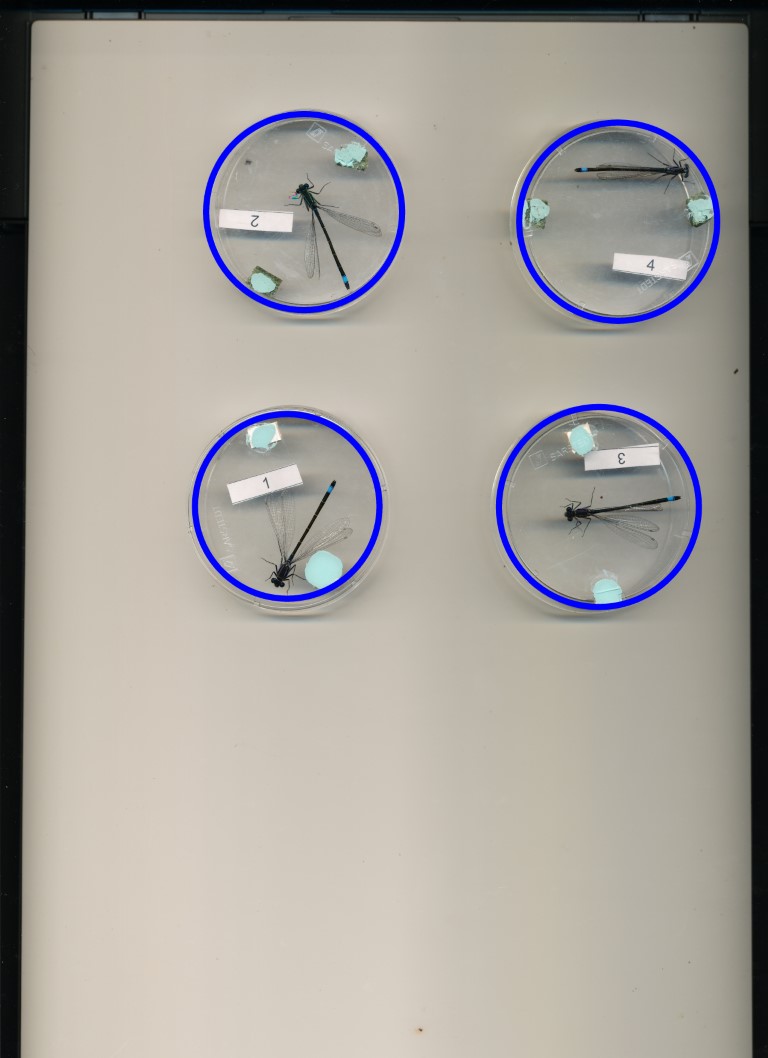
To have an image size that is more easily manageable, the petridishes are detected and extracted with the detect_mask function shown in https://www.phenopype.org/gallery/project_7/. Then, using save_ROI, the region of interest (ROI) are saved, and used for the project creation
Add a project-wide size and color reference that will be detected in the images. Don’t forget to set the project-wide reference tag, which is useful in case your project uses multiple reference cards.#
## load image

data_dir = r"data_raw\damselfly-phenomics"
img_full = pp.load_image(os.path.join(data_dir,"full-scan.jpg"))

## detect_mask needs single channel images
gray = pp.preprocessing.decompose_image(img_full, channel="gray")

## detect circles
circles = pp.preprocessing.detect_mask(
    gray, shape="circle", resize=0.25, circle_args={
        "param1":200,
        "param2":150,
        "min_dist":1000,
        "min_radius":600,
        "max_radius":800}
    )


## save all ROIs as separate jpeg files
pp.export.save_ROI(
    image=img_full,
    annotations=circles,
    file_name="odonata",
    suffix="roi",
    dir_path=data_dir
    )
Make phenopype project#
Create a phenopype project (remember, Project is used to both create new projects, and load existing ones). Different phenopype projects can be useful, e.g., to process different batches of images from field seasons, perspectives, etc,. It makes sense to create them side by side in a subfolder, which I call “phenopype”. Thus, my research projects often have the following directory structure (just my way of working - this is really totally up to you):
my-project
    data                       # processed data (e.g., tables)
    data_raw                   # raw data (images, videos, etc.)
    phenopype                  # phenopype projects
    phenopype_templates        # phenopype .yaml config templates
    scripts                    # python, R, etc.
    [...]                      # manuscripts, figures, literature, etc.
proj = pp.Project(r"phenopype\damselfly-phenomics")
## add tooth-images from the data folder, but exclude the images containing multiple teeth
proj.add_files(image_dir = r"data_raw\damselfly-phenomics", include="roi", mode="link")
## add the config template; provide a tag
proj.add_config(template_path=r"phenopype_templates\damselfly-phenomics.yaml", tag="v1", overwrite=True)
## run image processing
for path in proj.dir_paths:
    pp.Pype(path, tag="v1")
Modify config to extract shape and texture features#
target1 = """    - export:"""
replacement1 = """    - measurement:
        - compute_shape_features:
            contour_id: b
        - compute_shape_features:
            contour_id: c
        - compute_texture_features:
            channels: [r, g, b, h, s, v]
            contour_id: b
        - compute_texture_features:
            channels: [r, g, b, h, s, v]
            contour_id: c
    - export:"""

proj.edit_config(tag="v1", target=target1, replacement=replacement1)
## run image processing with deactivated feedback
for path in proj.dir_paths:
    pp.Pype(path, tag="v1", feedback=False)
proj.collect_results(files=["canvas", "shape", "texture"], tag="v1", aggregate_csv=True, overwrite=True)